Grai: A Comprehensive Guide to Data Lineage in your Data Stack

Grai is a robust data lineage solution designed to aid in managing your data stack.
This blog post guides you through configuring Grai for a data stack using DBT, Snowflake, Fivetran, and Postgres, and demonstrates how to validate data changes in your version control system to prevent outages rather than respond to them.
Setting the Scene: Your Data Stack
Let's set the scene with an overview of the data stack in question:
- DBT – A transformation and testing tool for your data warehouse.
- Snowflake – A cloud data platform that serves as the data warehouse.
- Fivetran – An ELT (extract, load, transform) solution that brings data into your warehouse.
- Postgres – The primary operational database.
Configuring Grai: Step-by-Step Guide
Now, let's configure Grai using its web app. Simply follow these steps:
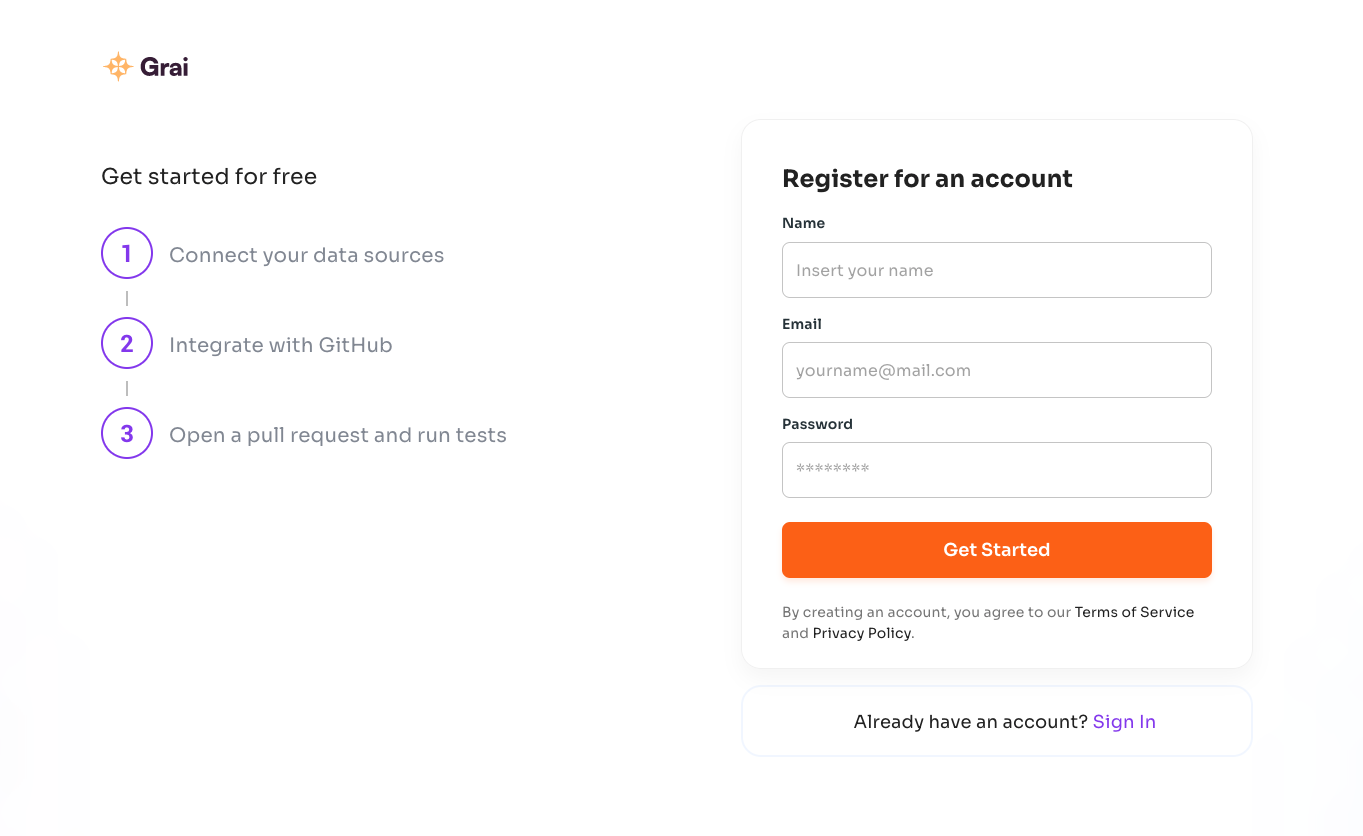
Step 1: Sign Up for a Grai Account
Head over to Grai's website and sign up for an account at https://app.grai.io/register
Step 2: Add Data Sources
Once you've signed up, navigate to the "Connections" tab and click "Add Connection."
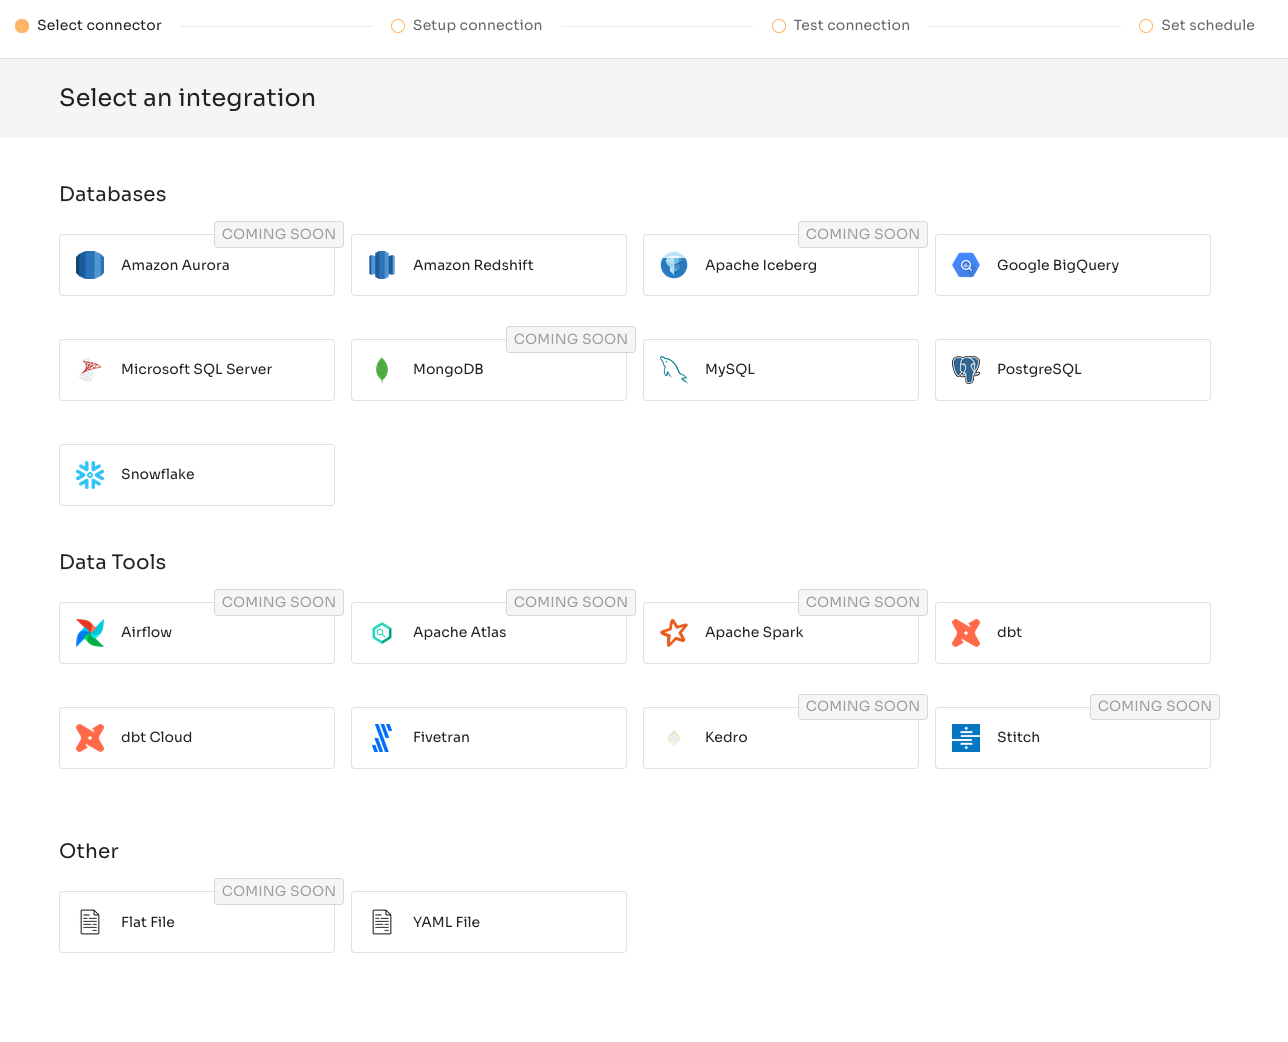
You'll need to add Snowflake, Fivetran, and Postgres. Each connection will require slightly different authentication credentials. For example, to configure Fivetran you'll need both an api_key and api_secret, you can find more information in Fivetran's documentation here.
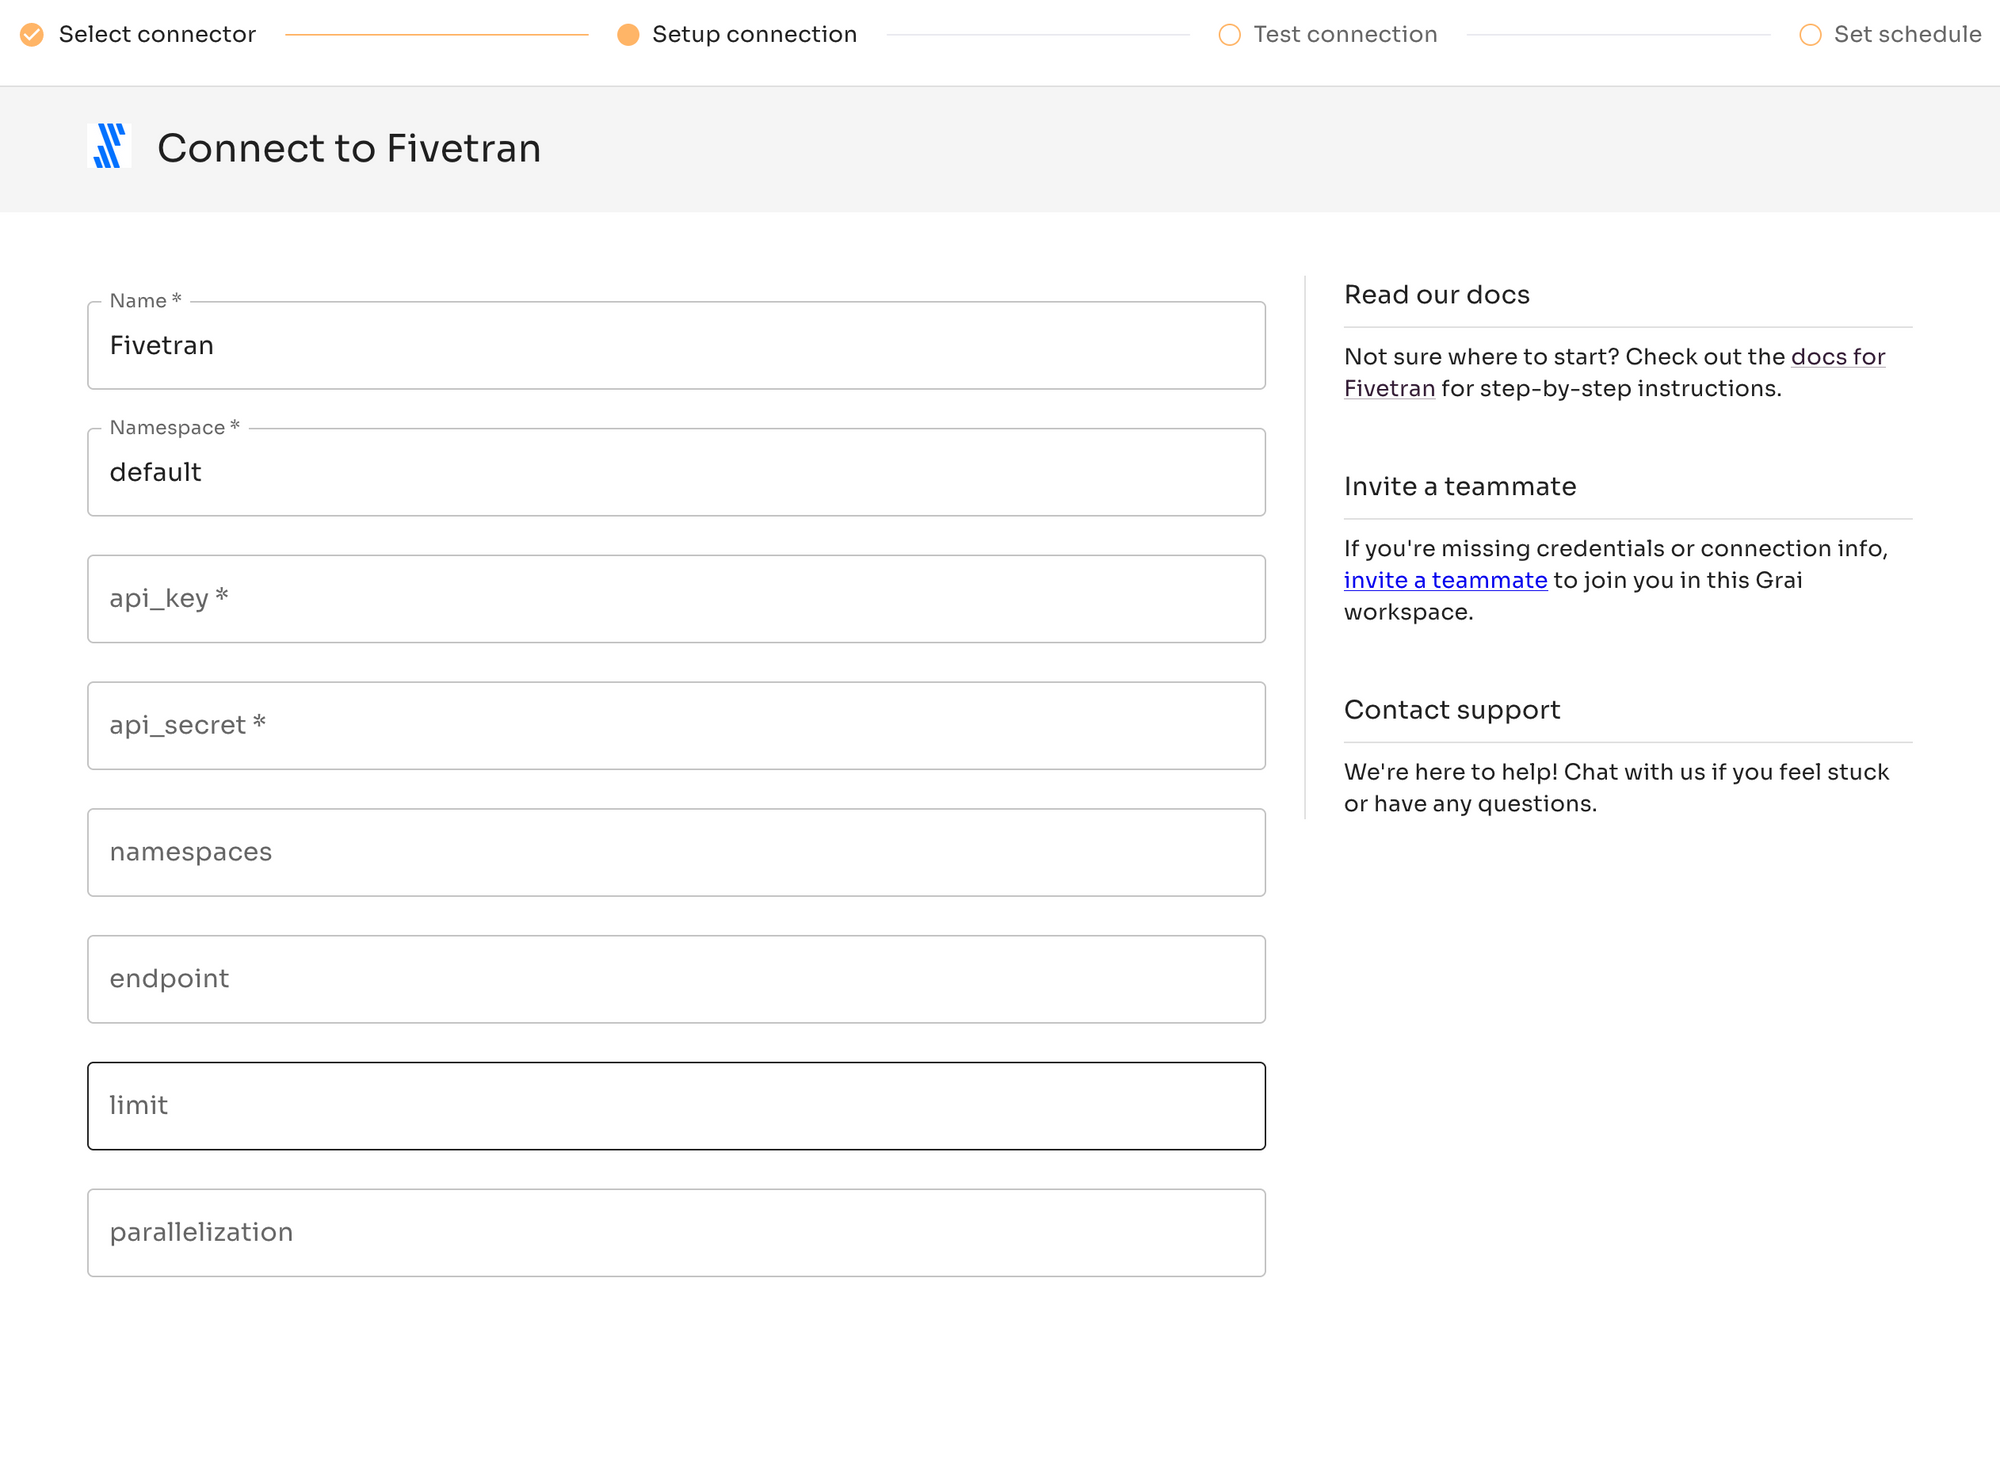
For now we will leave the optional values like namespace empty.
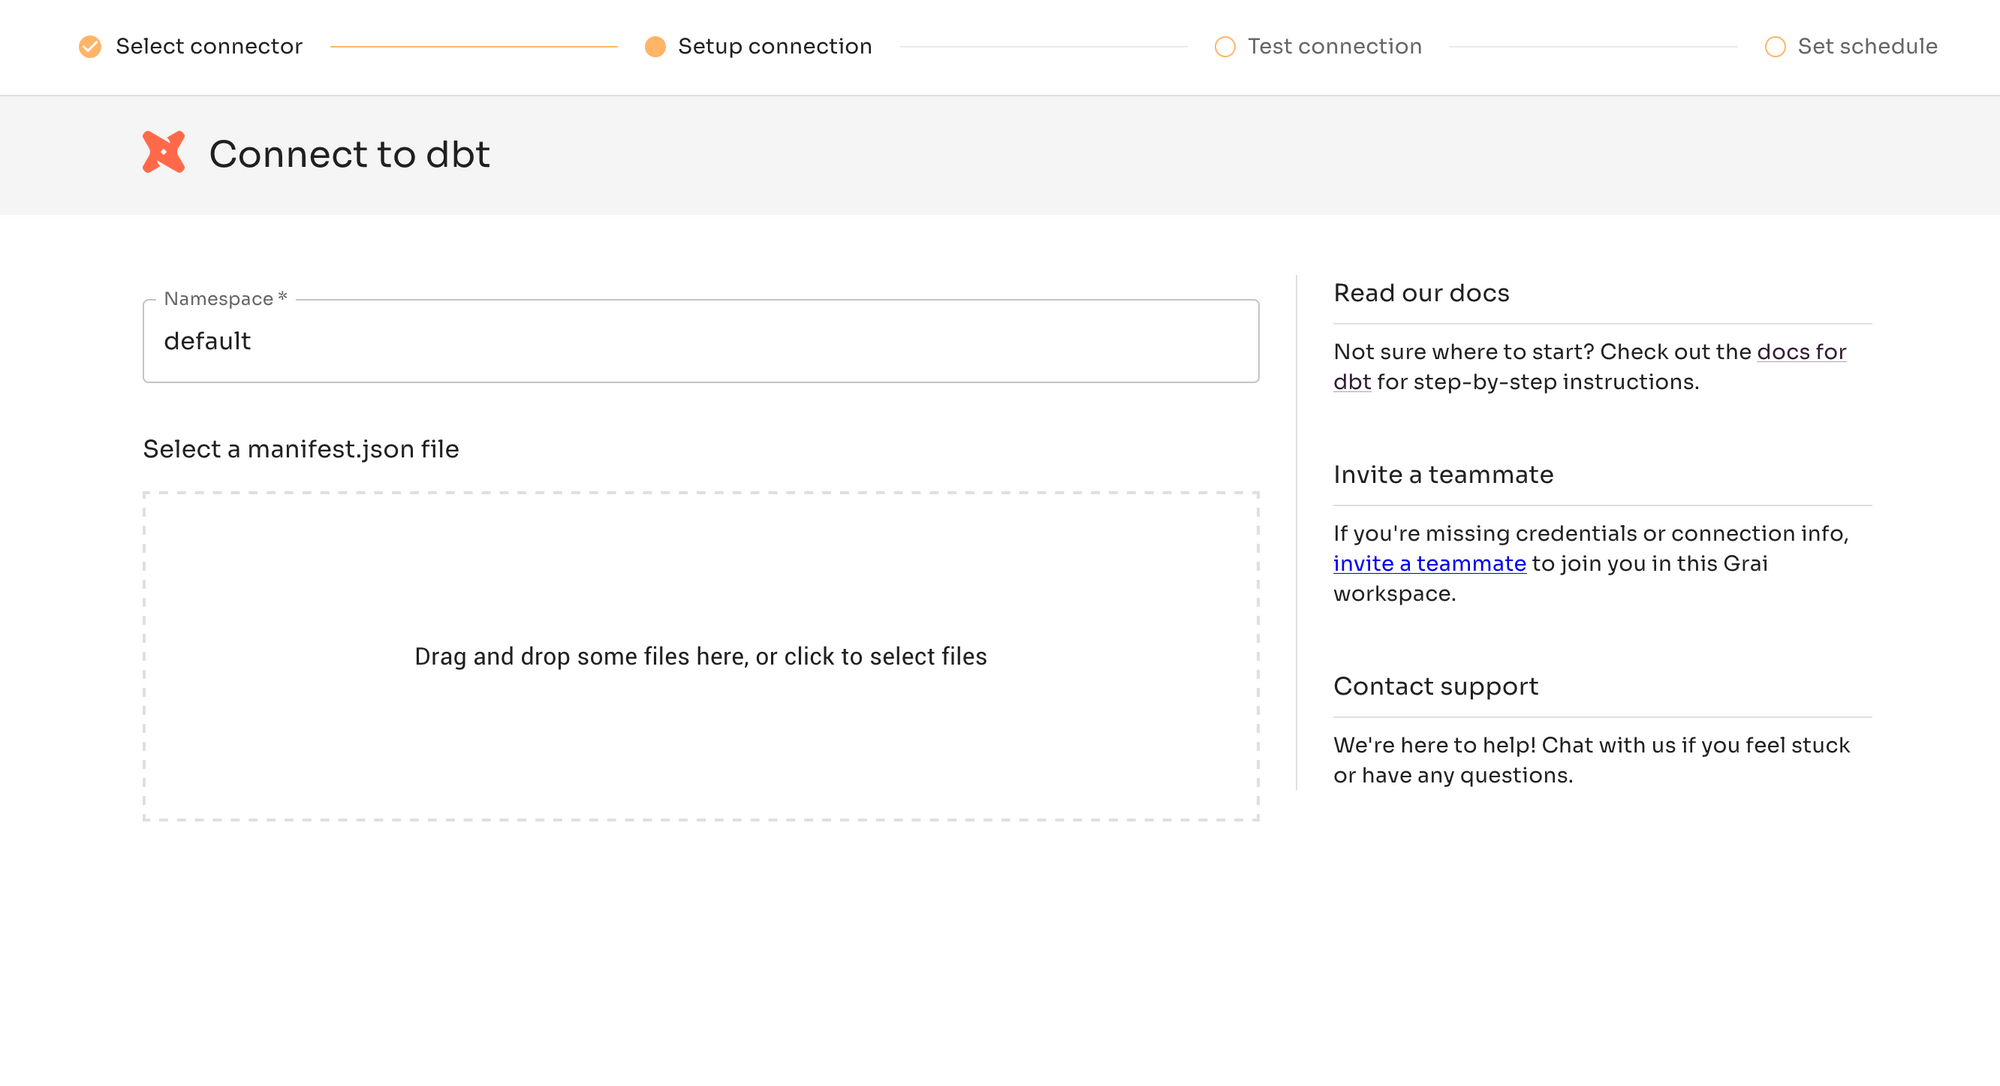
Step 3: Upload your dbt manifest
Still in the "Add Connection" page, the dbt integration works slightly differently. In this case you simply need to upload an up-to-date manifest.json
Step 4: Complete the Setup Process
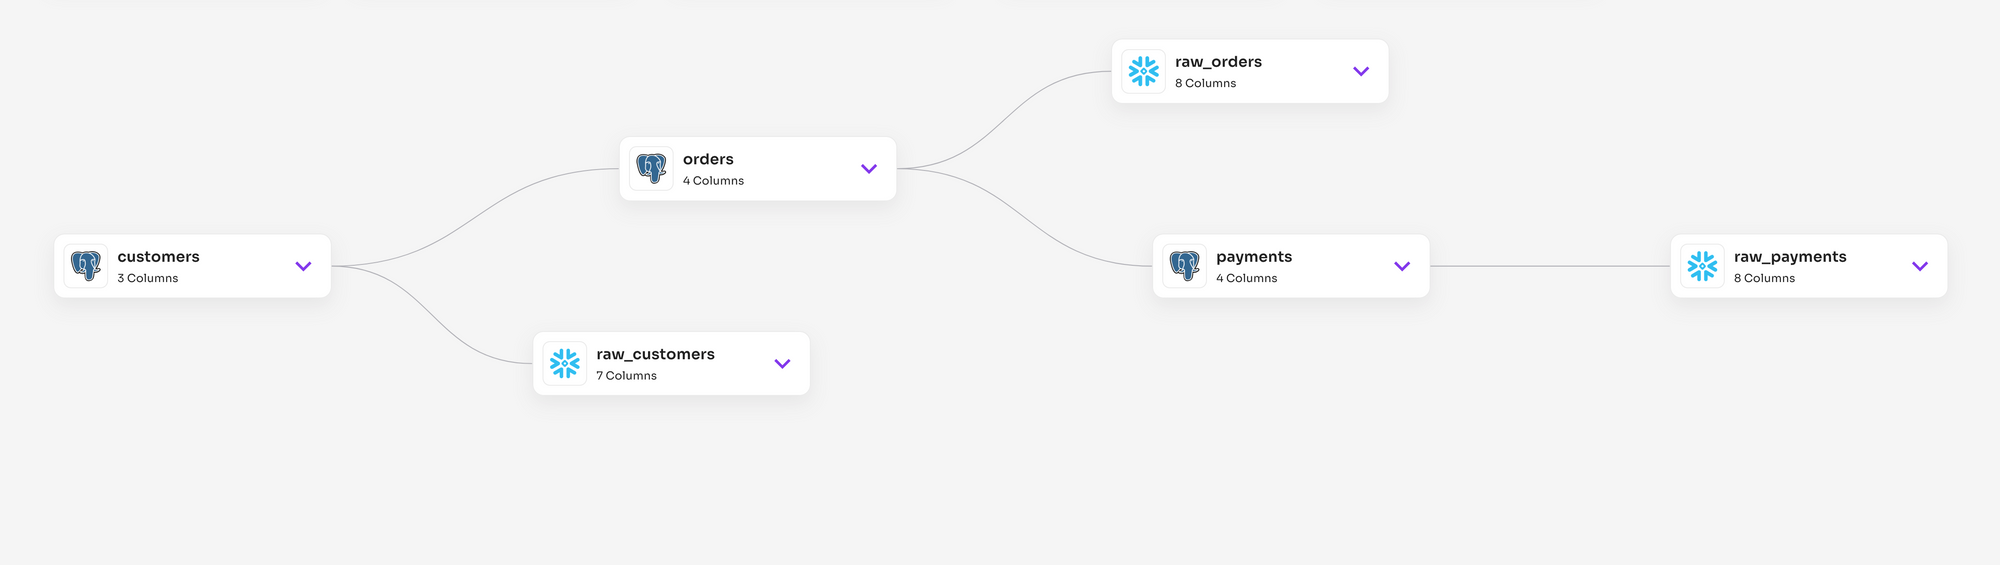
After setting up each integration, Grai will automatically ingest data lineage information from your data stack. Navigate to the "Graph" tab at the top of the page to see how your infrastructure connects together. It should look something like this.
Configuring GitHub: Bringing Grai into CI
Now that Grai is configured you're ready to begin using data lineage as part of your testing process. A common testing pattern is to deploy a dev database as part of the CI process. This can be done in a variety of ways - we are fond of using service containers in GitHub Actions but we've also seen companies follow dev/test/prod databases corresponding to dev/test/prod branches in git.
Whichever way you deploy you can integrate tests into CI using one of our supported GitHub Action integrations. More information is available in the docs for how to use each action.
Github Workflows
Since our production database is postgres you'll be deploying the Grai postgres action wherever in whichever repository you use to manage the production database. This is a pretty simple script we'll be placing in the ".github/workflows" folder of your repository. If you don't have any existing workflows you can create a file called "main.yaml" to work from. All that's left to do is copy the content of that yaml to your workflow file.
on:
  - pull_request
name: PostgreSQL
jobs:
  test_postgres:
    runs-on: ubuntu-latest
    steps:
      - name: Checkout
        uses: actions/checkout@v3
      - name: Run Grai Action
        uses: grai-io/grai-actions/postgres@master
        with:
          namespace: my_apps_grai_namespace
          grai-user: your_username
          grai-password: your_password
          namespace: default
          db-host: prod.db.com
          db-port: '5432'
          db-database-name: my_database
          db-user: my_user
          db-password: my_password
Ensure the database credentials you provide here point to the dev database you want to test, not the production database configured above. You'll also want to update your username and password.
Grai in Action: Validating a Pull Request
Now you're done! All that's left to do is begin testing your changes. Every pull request against your production database will now run tests to validate the changes against your DBT tests.
Step 1: Create a Pull Request
First, create a pull request with the proposed change in your Git repository.
Step 2: Grai Validates the Change
Grai will automatically validate the change by analyzing the impact of the proposed modification on the entire data stack.
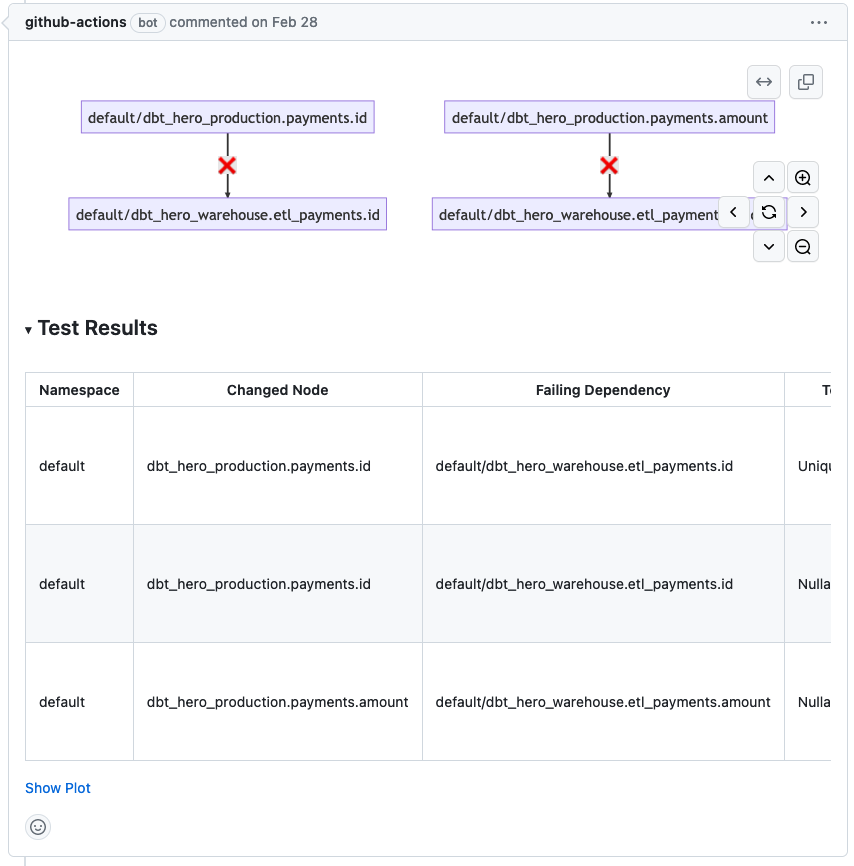
Step 3: Grai Reports on the Issue
If a test fails or some other issue is detected, Grai will reports back in the pull request, alerting users to the detected problem and preventing any potential outages from going live.
Wrapping Up
Grai is a game-changing tool that brings data lineage to the forefront, enabling you to maintain the integrity of your data stack by validating changes and preventing potential issues. By integrating Grai into your data stack, you can ensure a more reliable and robust data pipeline.
Happy data lineage tracking!